例程讲解05-Snapshot->snapshot_on_face_detection人脸识别拍照
import sensor, image, pyb
RED_LED_PIN = 1
BLUE_LED_PIN = 3
sensor.reset()
sensor.set_pixformat(sensor.GRAYSCALE)
sensor.set_framesize(sensor.HQVGA)
sensor.skip_frames(time = 2000)
face_cascade = image.HaarCascade("frontalface", stages=25)
while(True):
pyb.LED(RED_LED_PIN).on()
print("About to start detecting faces...")
sensor.skip_frames(time = 2000)
pyb.LED(RED_LED_PIN).off()
print("Now detecting faces!")
pyb.LED(BLUE_LED_PIN).on()
diff = 10
while(diff):
img = sensor.snapshot()
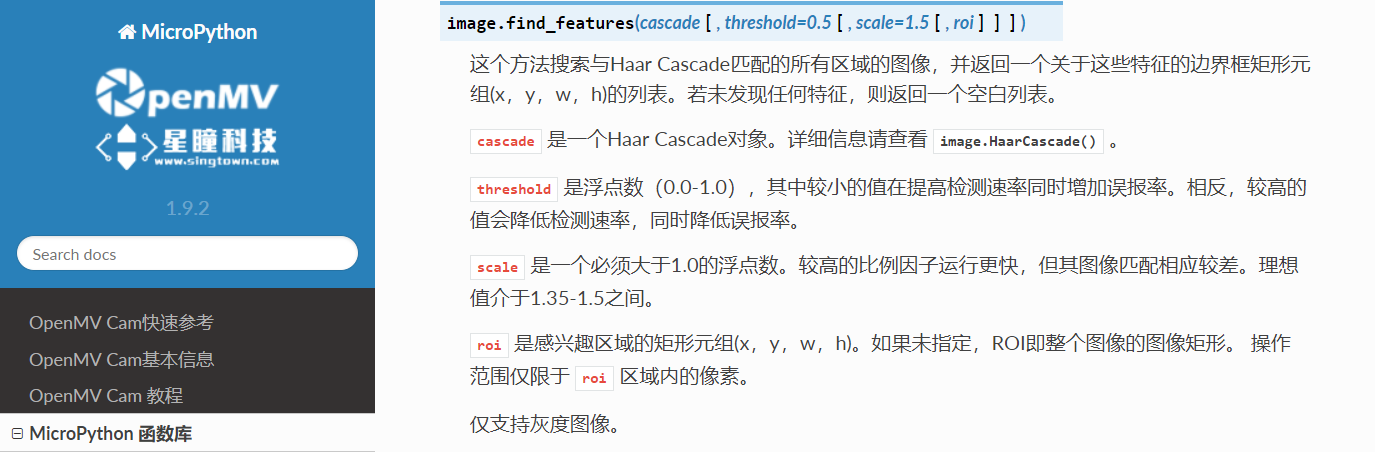
faces = img.find_features(face_cascade, threshold=0.5, scale_factor=1.5)
if faces:
diff -= 1
for r in faces:
img.draw_rectangle(r)
pyb.LED(BLUE_LED_PIN).off()
print("Face detected! Saving image...")
sensor.snapshot().save("snapshot-%d.jpg" % pyb.rng())
星瞳科技OpenMV官方中文文档函数讲解: